A full-size arcade cabinet takes up about as much floor space as a small desk, while a shadow box frame holding a disassembled handheld console fits on any bedroom wall.
The size of your space decides whether you fill it with arcade cabinets, line the walls with CRTs, or build around seated console play.
1. Classic Arcade Basement Haven
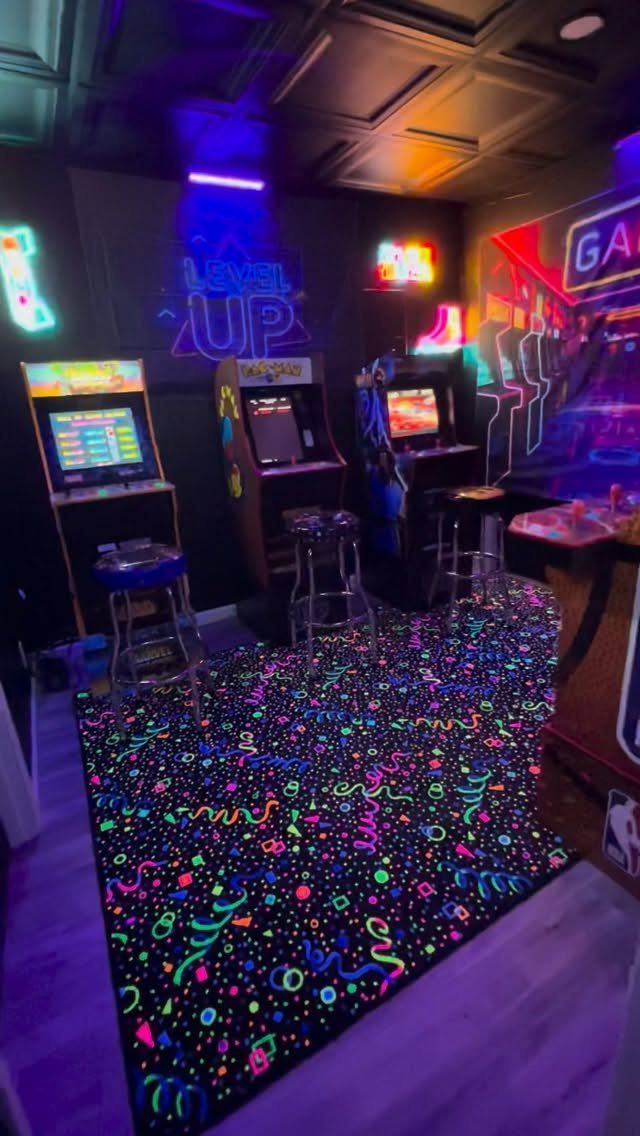
Full-size arcade cabinets turn a basement into the kind of room that feels like walking into a coin-op hall in 1985.
You get the full stand-up experience, the original artwork on the sides, and the tactile satisfaction of a real arcade stick and buttons.
3 machines give you enough variety to keep a few people occupied.
Restored originals vary widely by title and condition. Replica cabinets with multi-game boards save you the maintenance headaches of decades-old electronics.
Neon signs add atmosphere without major wiring.
Battery-powered LED neon mounts with adhesive strips. A patterned rug defines the play area and softens the concrete underfoot.
Bar stools let people rotate in and out between games. I prefer backless stools in a space like this because they tuck under a wall-mounted shelf when you need floor space.
2. Neon-drenched Gaming Cave
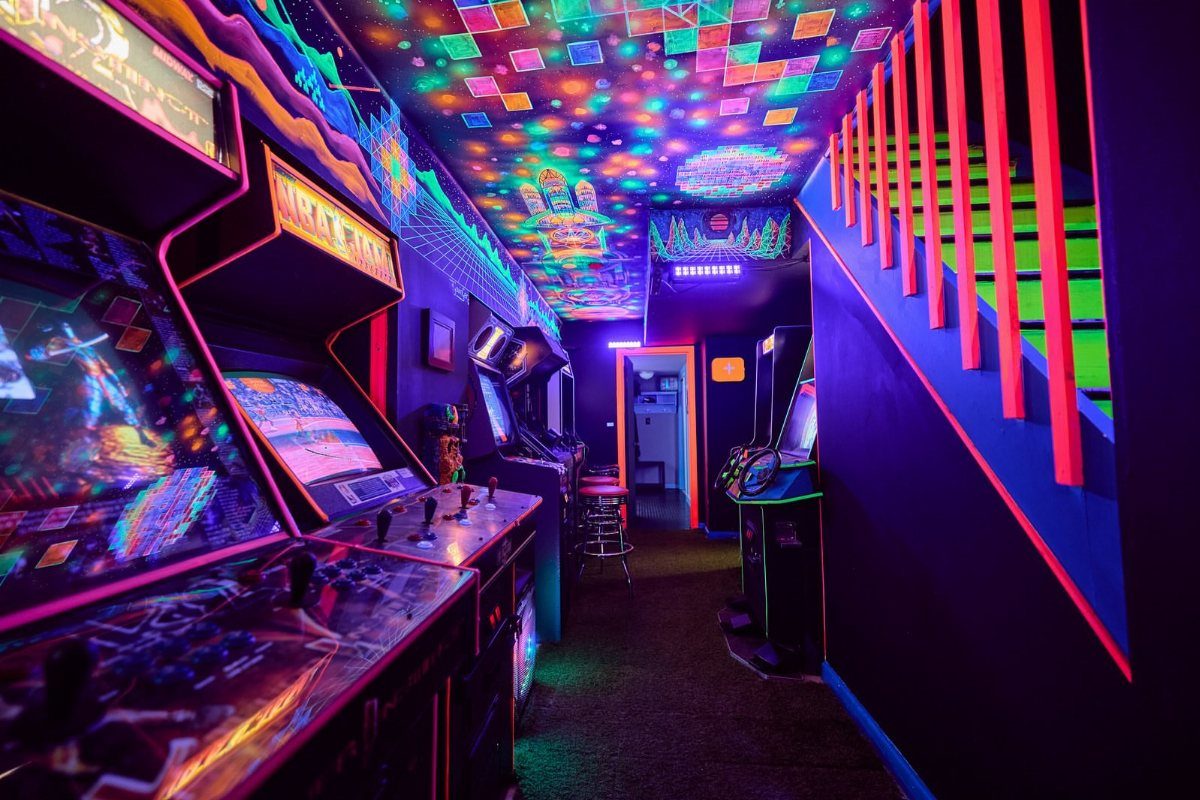
Neon lighting on the ceiling and walls saturates the room with color and puts the focus on the machines instead of the space around them.
The glow bounces off dark walls and ceilings, which makes a small basement feel bigger than bright paint ever would.
Mount them along the edges of shelving, behind arcade cabinets, or in aluminum channels on the ceiling for a cleaner line. RGB strips let you change the color to match different games or moods.
A hand-painted ceiling mural adds a custom layer.
Geometric shapes, pixel art, or abstract gradients all work. Use interior latex paint and mask off sections with painter’s tape for crisp edges.
Keep everything else dark. Black or deep charcoal walls let the neon do the work.
3. Retro Console Museum Display
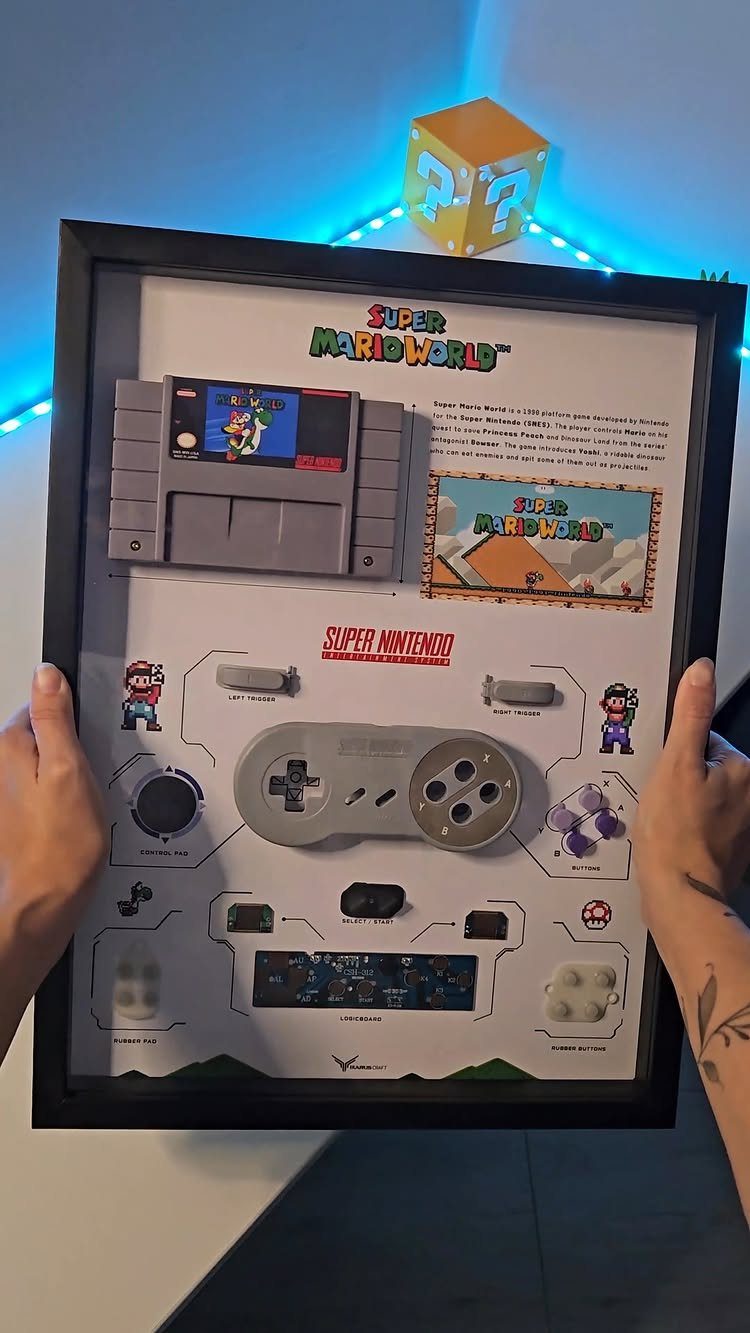
A shadow box mounted on the wall turns a cartridge and controller into a piece of functional art.
You get to see the circuit board, the shell, and the label all at once, which gives the display more depth than a shelf full of intact cartridges ever could.
Disassemble the cartridge with a security screwdriver.
Most Super Nintendo and Sega Genesis carts use a game bit security screw. Arrange the shell halves, board, and label inside a deep frame with a foam or fabric backing.
Mount the controller with small zip ties looped through the frame backing or with museum putty. Add a printed title card below the pieces if you want the game name and release year visible.
The question block above the frame ties it back to the game itself and leaves the display clean.
4. CRT TV Wall Battlestation
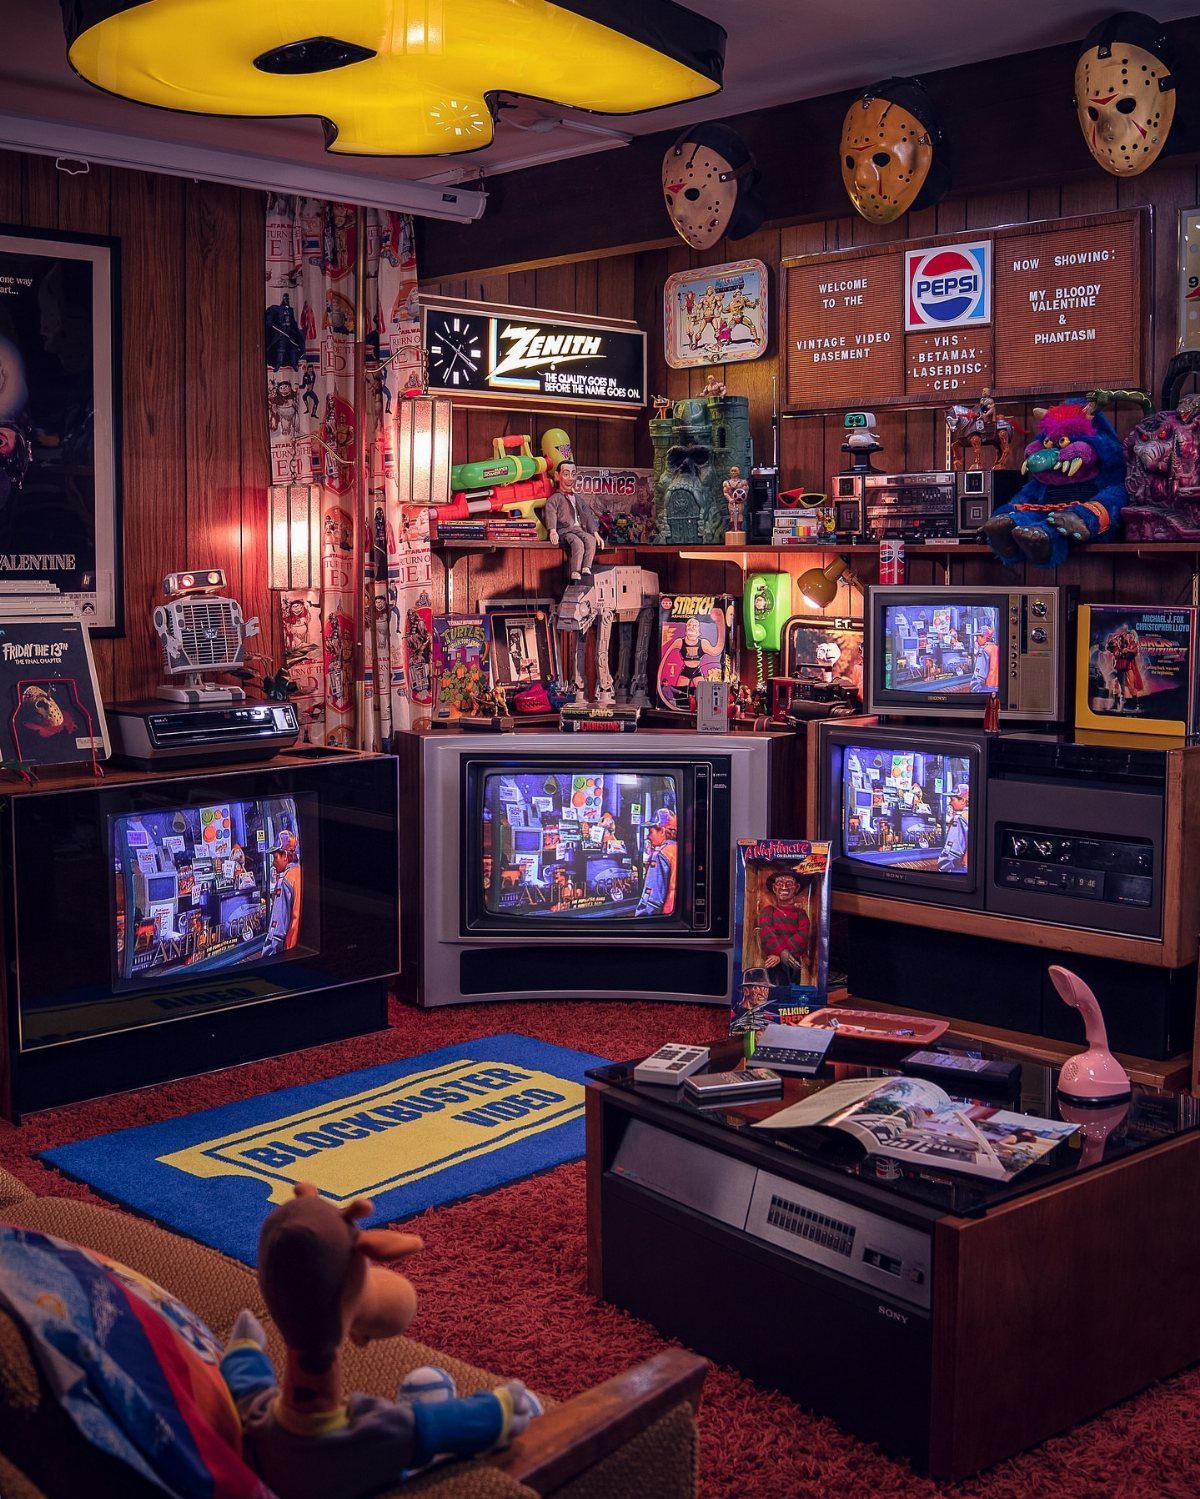
A wall of CRT televisions lets you run multiple consoles at once, each on its native display with zero lag and the scan lines people remember from playing these games the first time.
Older systems look sharper on a CRT than they ever will on a flat panel with upscaling.
Stack small CRTs on shelves or a low console.
Larger sets get heavy fast; a 27-inch tube weighs 70 to 90 pounds. Wire each TV to its own console so you can switch between systems without unplugging anything.
The Blockbuster rug and horror masks anchor the room in late 90s rental store culture, which overlaps with the PlayStation and N64 era. I like that specificity more than generic retro decor.
Leave space between the TVs for airflow. CRTs run hot, and stacking them too tight shortens their lifespan.
5. Create a Versatile Room
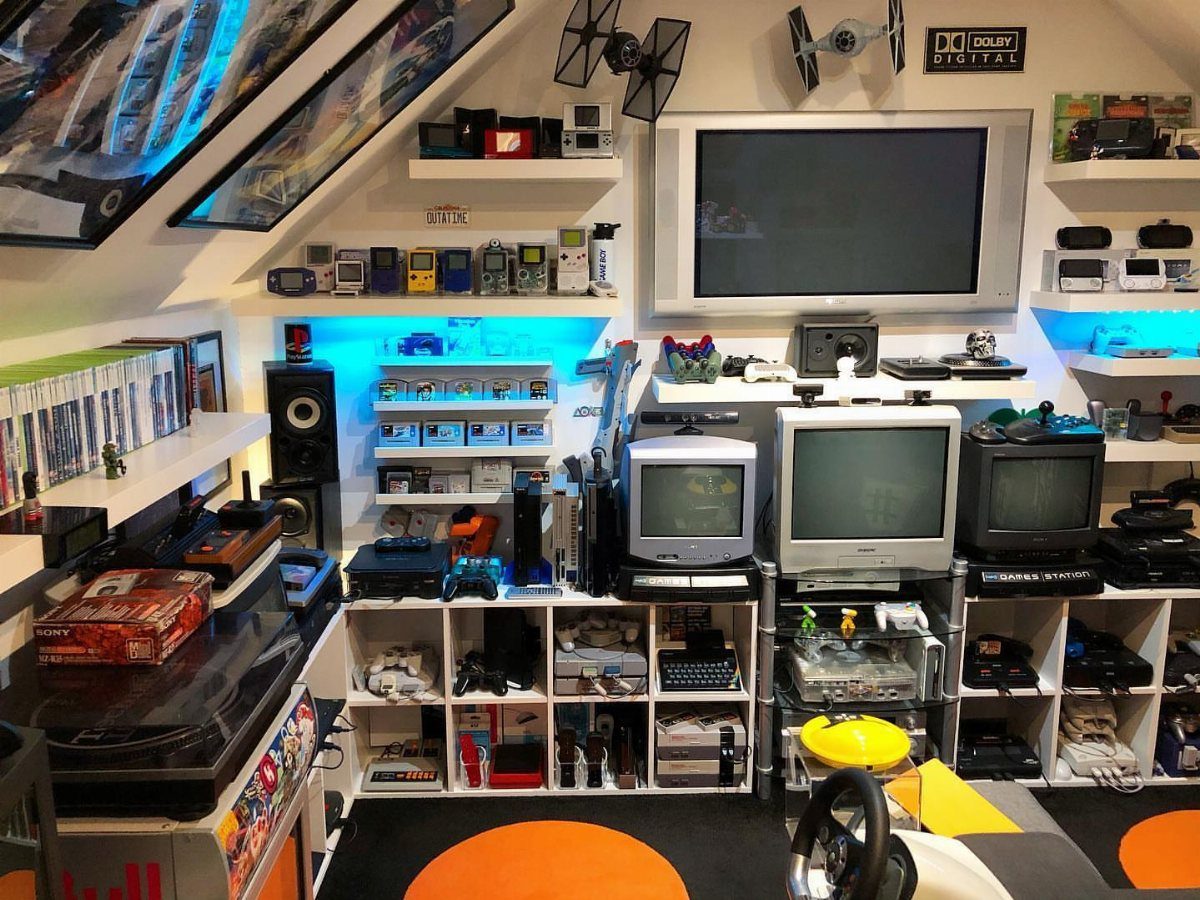
A room that handles racing wheels, light guns, and handheld consoles keeps every game playable the way it was designed.
You avoid the friction of swapping gear or compromising on controllers, which means you actually use the systems instead of leaving them on a shelf.
Mount CRT monitors on adjustable arms or stackable shelves so you can position each screen at the right height for sitting or standing play.
A racing wheel needs a stable surface; bolt it to a dedicated rig or clamp it to a heavy desk.
Store handhelds on open shelving where you can grab them without moving other systems. Dolby Digital audio from a receiver and bookshelf speakers gives you proper sound staging for games that used surround encoding.
I keep a power strip with individual switches for each system. It cuts down on wear from repeatedly plugging and unplugging vintage hardware.
6. Framed Pictures of Old Gaming Days
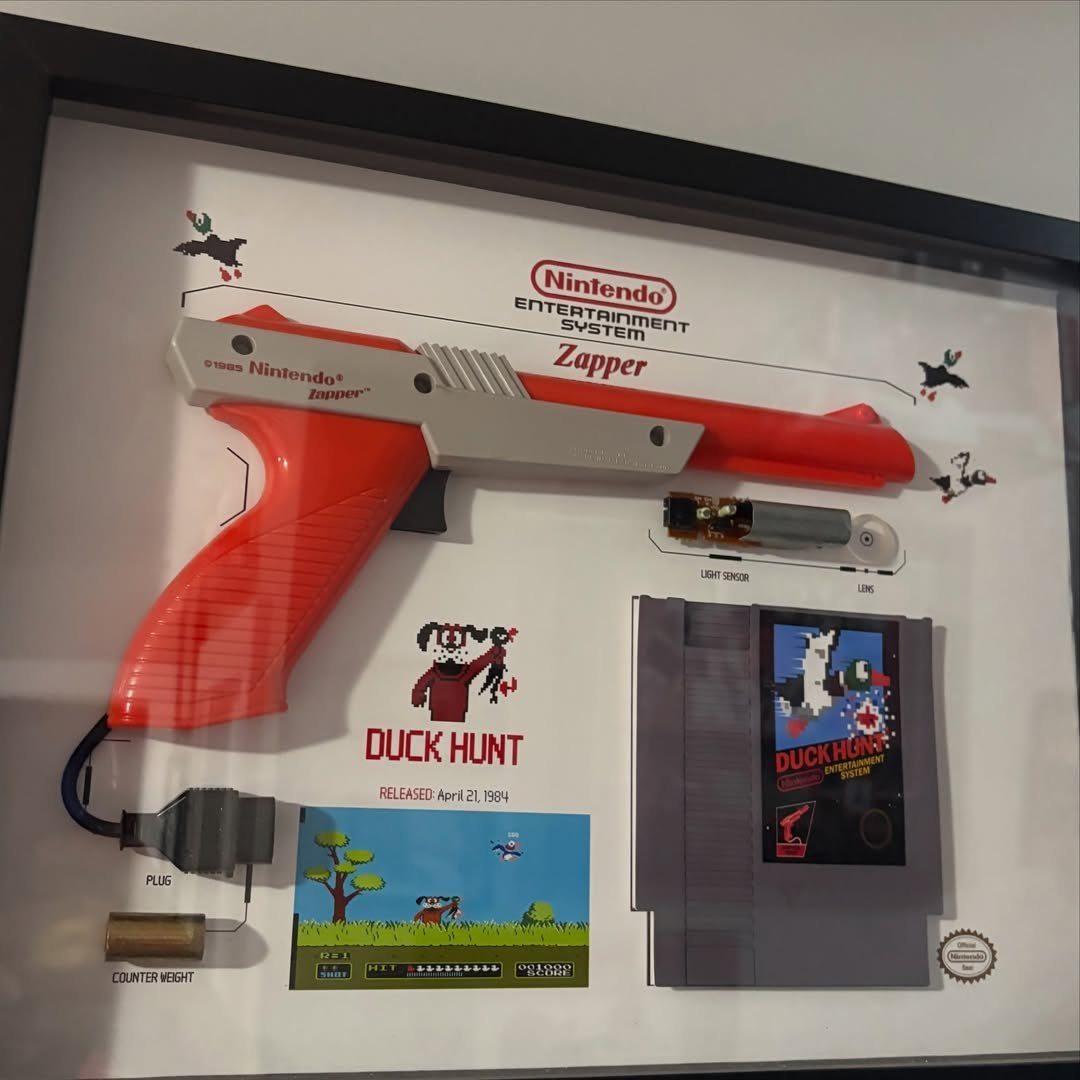
A framed display with the Zapper, the cartridge, and a screenshot from the game makes wall art that tells the story of an afternoon spent playing.
The bright red gun and 8-bit duck make it instantly recognizable even from across the room.
Use a shadow box deep enough to hold the Zapper without pressing it against the glass.
Most frames need enough depth to hold a cartridge. Mount the gun with museum putty or small wire brackets screwed into the backing board.
Print a screenshot on photo paper and mat it next to the cartridge.
Add a label with the game title and release year if you want the context visible. The white background keeps the focus on the objects instead of competing with the colors.
This works for any light gun game. Time Crisis with the GunCon or House of the Dead with the Dreamcast gun both frame well.
7. Pegboard Controller and Console Station
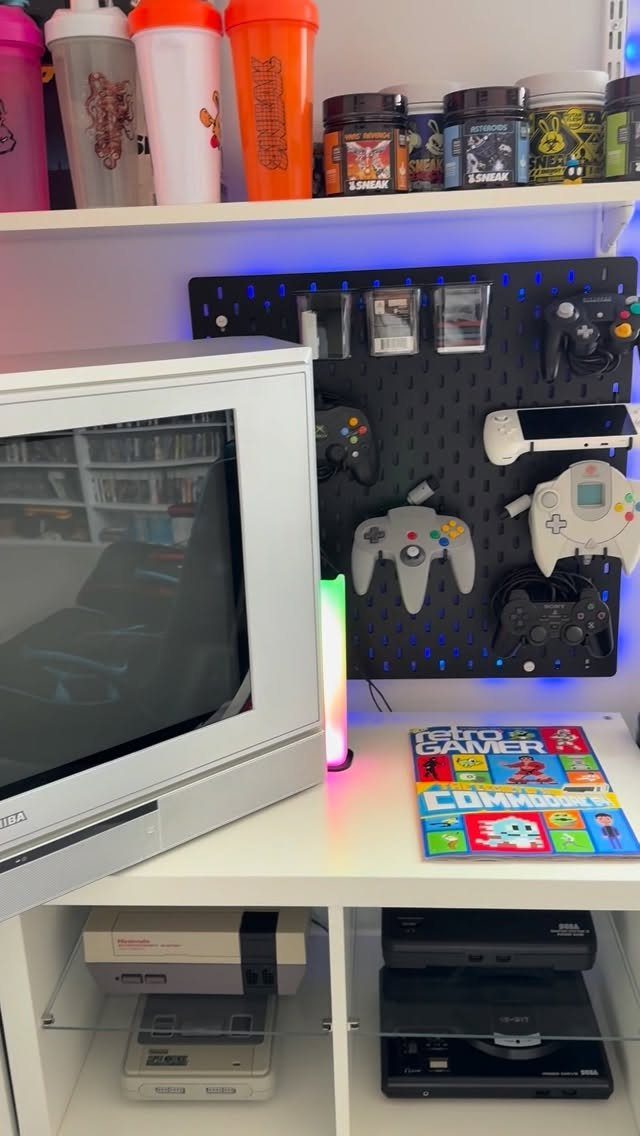
Pegboard keeps every controller visible and within reach without the tangle of a drawer or basket. Each piece hangs on its own hook, and you know instantly which system you want to play.
Mount the board to studs or use heavy-duty anchors if you’re going into drywall.
Pegboard holes space at regular intervals that let you hook controllers without measuring each time. Metal hooks hold heavier items like the Duke controller or a Steel Battalion panel better than plastic.
A CRT on a low shelf puts the screen at the right height for floor or couch play. Stack consoles on open shelving so the ventilation stays clear and you can reach the power switches without moving anything.
I run power strips behind the pegboard and route cables through the holes to keep everything off the floor.
8. Matching Translucent Console Setup
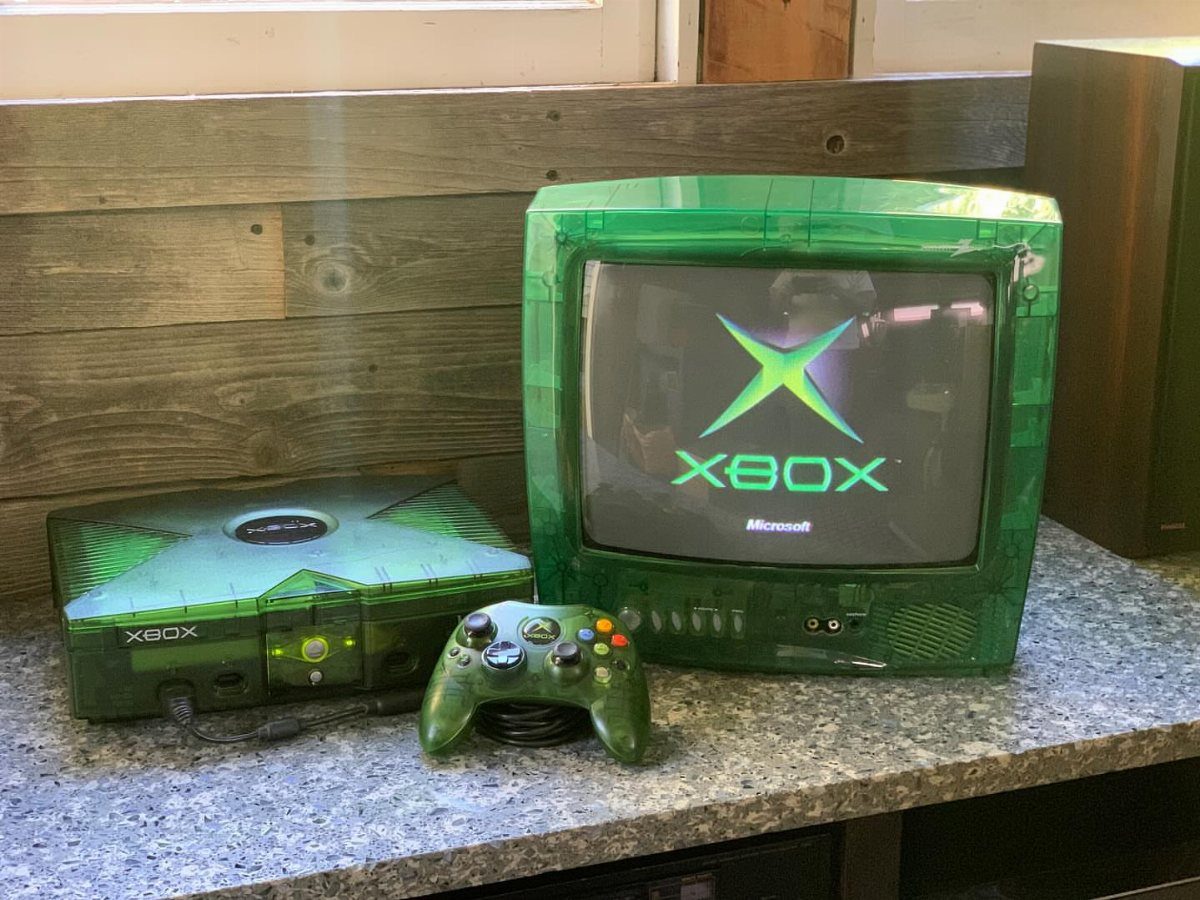
Matching translucent shells turn a console and its screen into a set, and the green CRT television is one of the rarest pieces to find in working condition.
The see-through casing lets you watch the electron gun fire, which adds movement to a static display.
The translucent Xbox came as a limited promotional unit, not a retail release.
You’ll find them on auction sites, and prices vary based on condition and whether the console still runs. The matching CRT is harder to source.
Place both on a stable surface with ventilation behind the TV.
CRTs generate heat, and the Xbox needs airflow through its side vents. The translucent plastic yellows with UV exposure, so keep it out of direct sunlight.
9. Disassembled Handheld Console Shadow Boxes
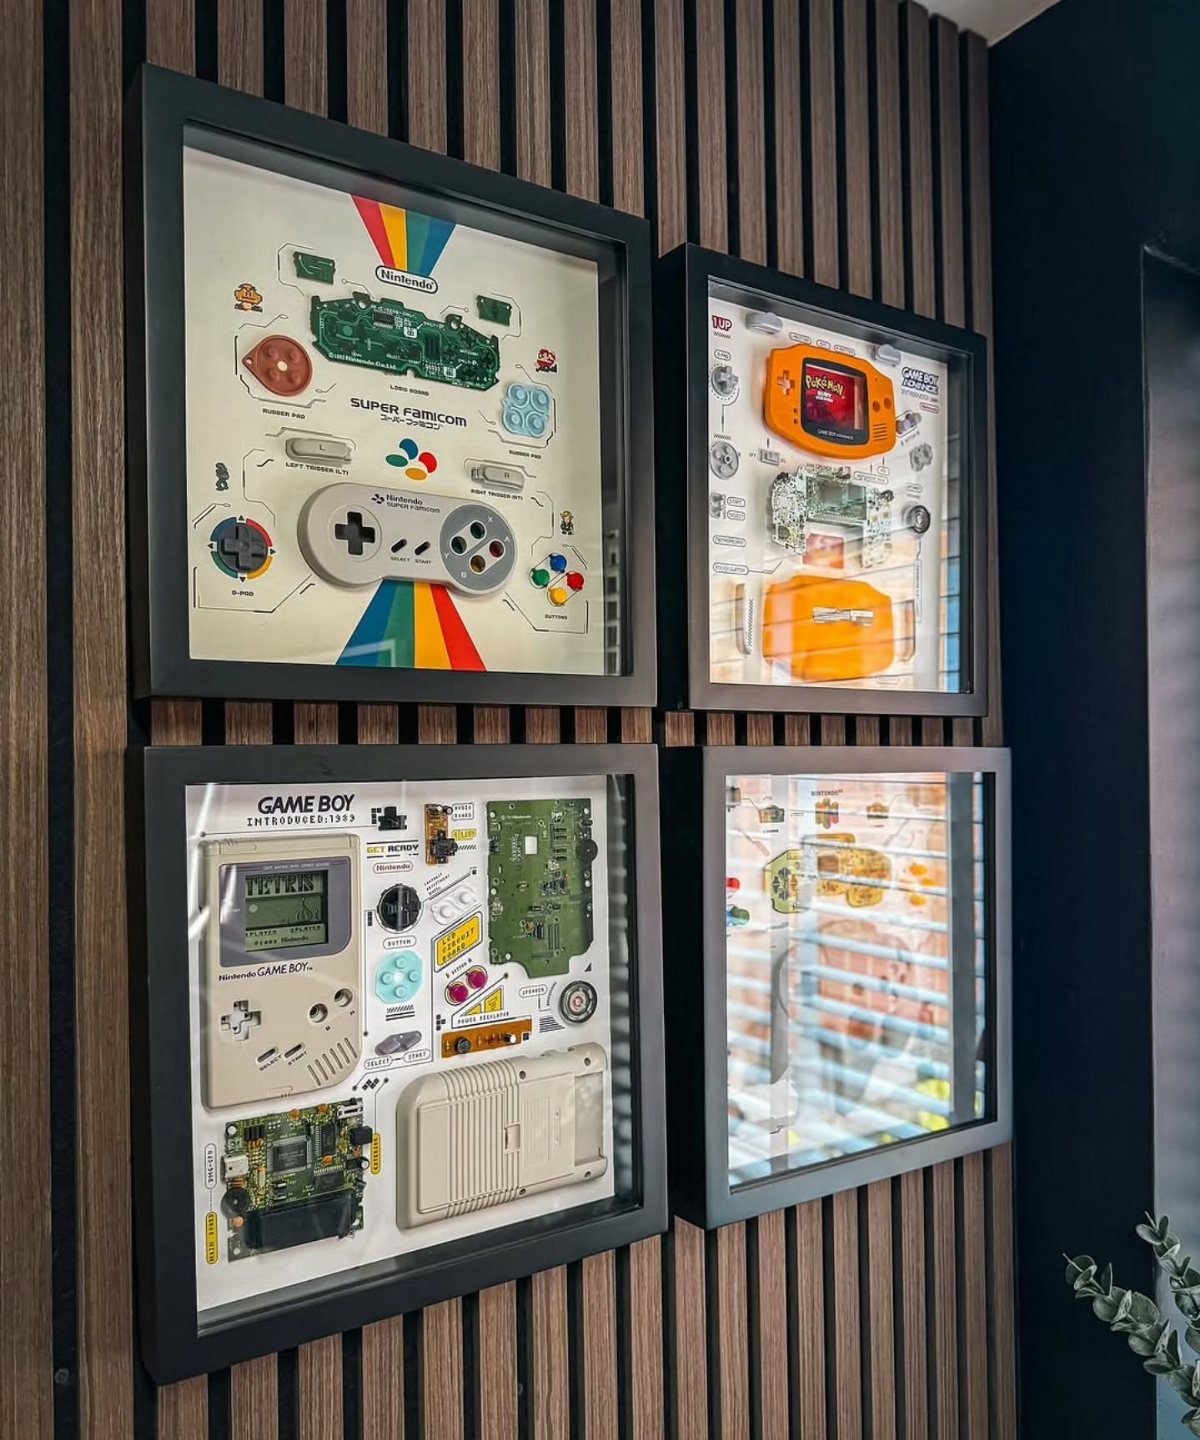
Opening a handheld console and laying out the shell, board, buttons, and screen inside a frame gives you wall art that shows how the hardware actually worked.
The board reveals the chip layout and solder joints you never see with the case intact.
Use a tri-wing screwdriver for Nintendo hardware and a small Phillips head for most others.
Arrange the parts on foam core or fabric backing inside a shadow box. Pin smaller components like screws and ribbon cables with museum putty.
4 frames make a grid that fills a wall section without feeling crowded.
10. Sensory Retro Corner with Lava Lamps
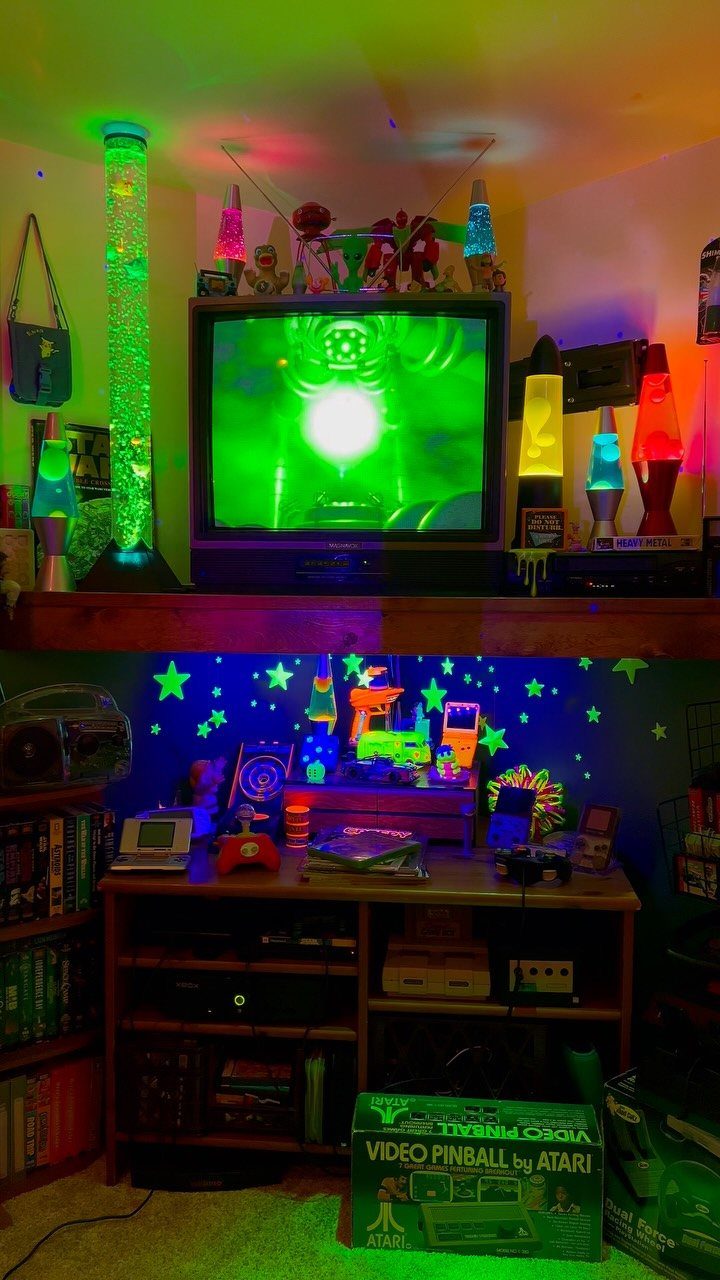
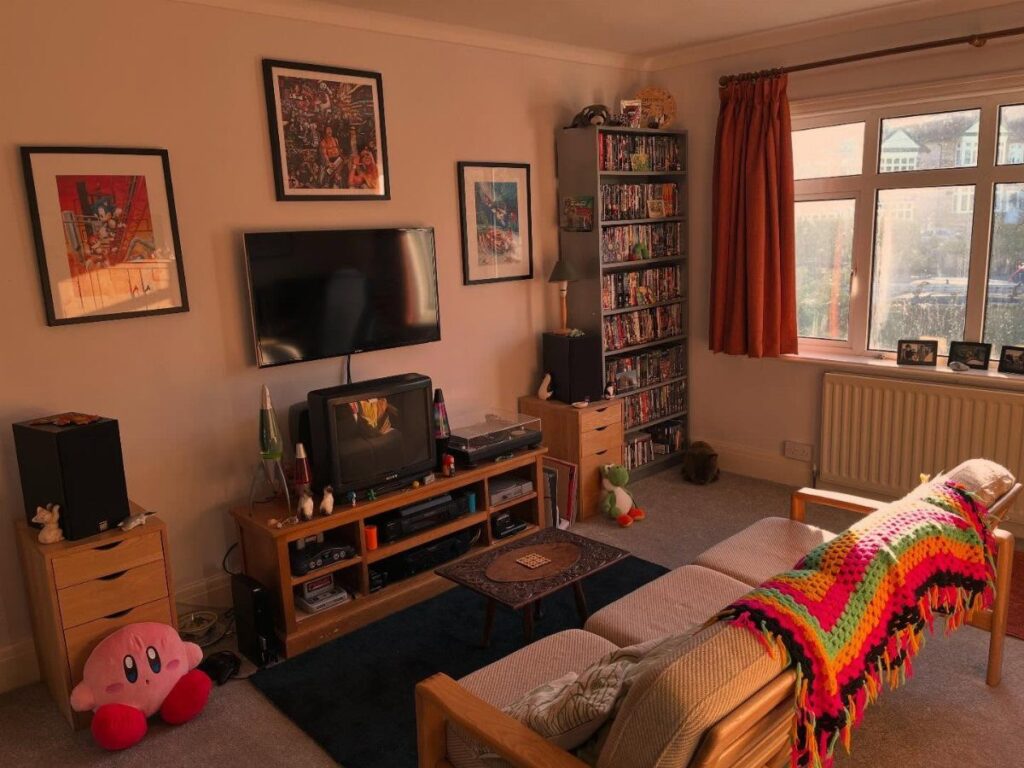
Lava lamps and a bubble tube add motion and soft light to a room where the CRT already supplies most of the glow.
The slow rise and fall of the wax creates a rhythm that matches long play sessions better than static lighting.
Place lamps on shelves or the floor around the TV.
Standard lava lamps draw modest wattage and need time to fully heat and flow. Bubble tubes need a flat base and an outlet; most run on low-voltage LED pumps.
Glow-in-the-dark stars on the ceiling charge under room light and add another layer after you turn everything off. I prefer this to overhead lighting, which washes out the screen.
11. Original PlayStation Gaming Nook
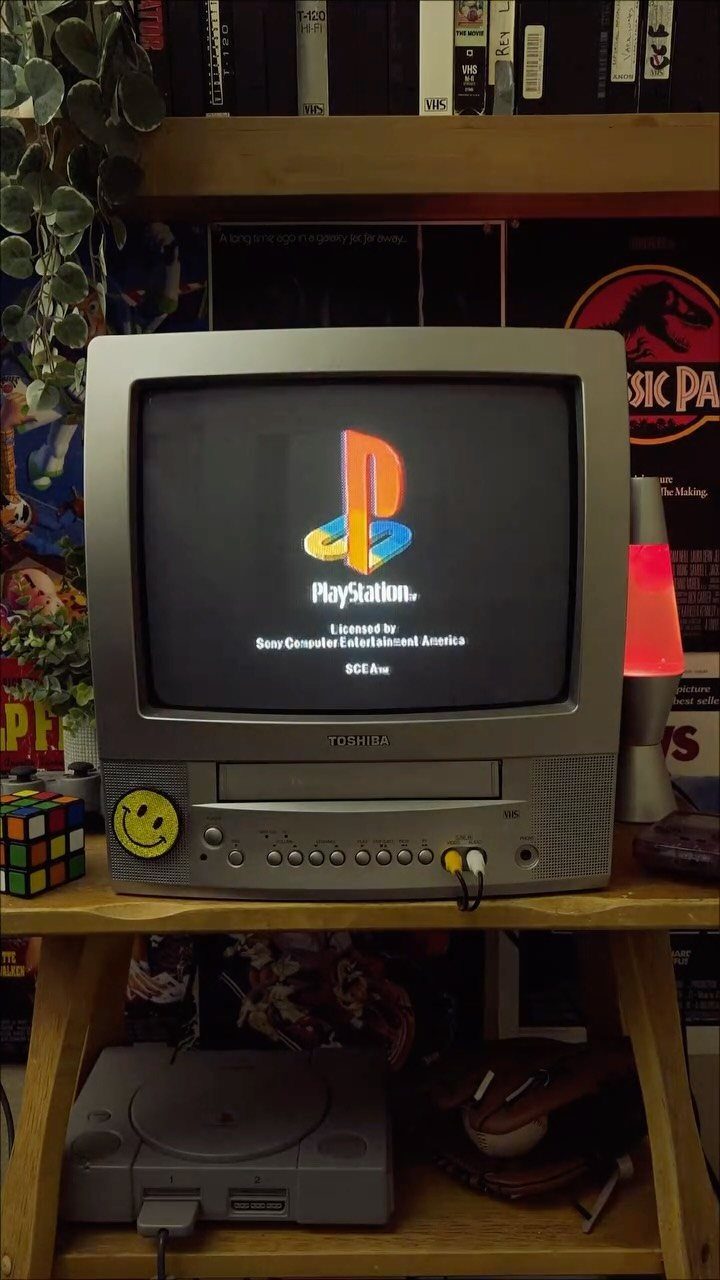
A single console setup with its matching CRT keeps the focus narrow and the space compact. The PlayStation startup screen on a Toshiba tube delivers the scan lines and the warm-up hum of playing these games the way they launched.
Wire the PS1 with composite or S-video cables.
Composite gives you the softer image most people remember, while S-video sharpens text and reduces color bleed. Keep the CRT on a sturdy shelf; even small tube sets carry real weight.
A lava lamp and a Rubik’s cube tie the corner to mid-90s culture without adding clutter. This works in a bedroom or office where space is tight.
12. Rainbow Cloud Ceiling Game Room
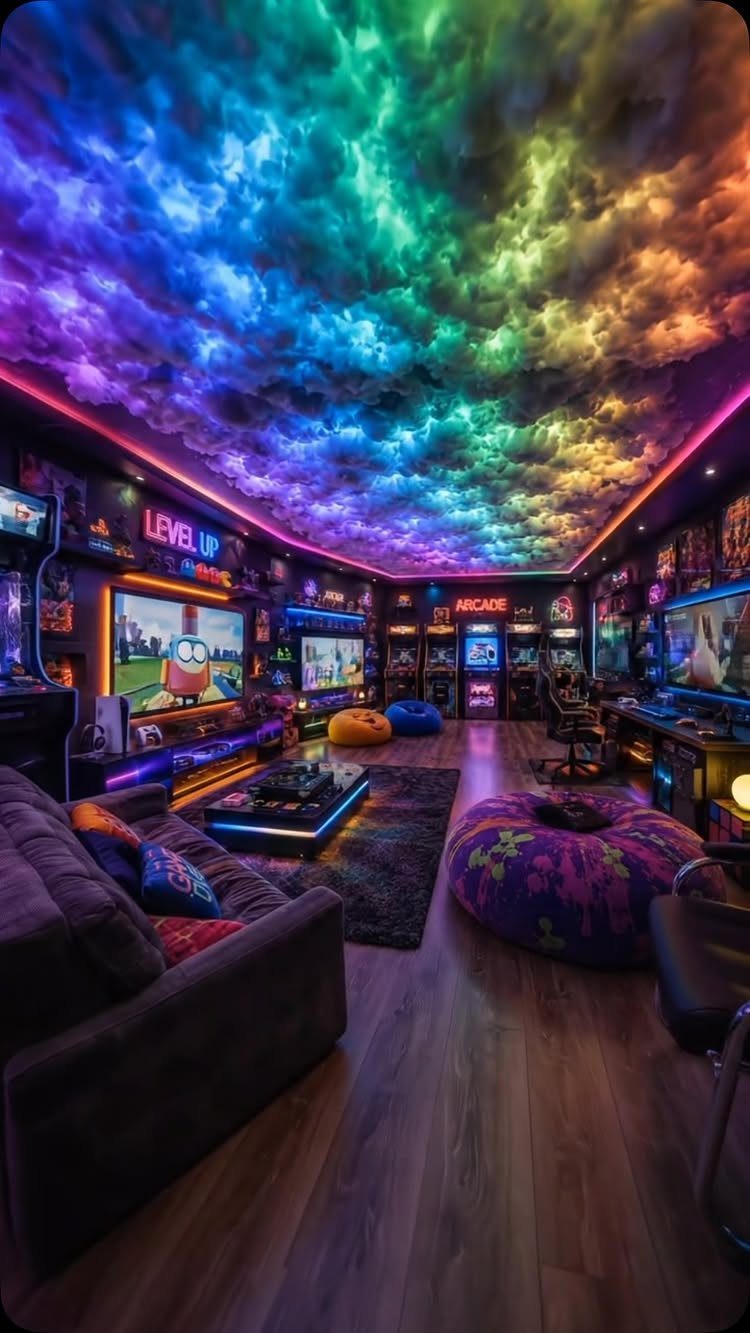
Glowing clouds on the ceiling fill the room with ambient color and soften the hard edges of arcade cabinets and neon signs. The rainbow gradient gives you full-spectrum light without installing complicated RGB systems.
Build the clouds with polyester stuffing hot-glued to chicken wire frames or cardboard backing. Tuck battery-powered LED strip lights inside before you mount them to the ceiling with adhesive hooks or wire.
Neon signs and arcade machines anchor the room below.
Bean bags and a sofa keep the seating flexible for different group sizes. I like how the ceiling draws your eye up instead of keeping everything at floor level.