Most of these hacks cost under $50 in materials if you already own a roller and a saw, though a solid wood desktop pushes the budget past $100.
A single Alex drawer unit paired with a leg takes up half the floor space of 2 units, and you still get plenty of storage for files and cables.
1. Painting IKEA Furniture with Interior Latex Paint
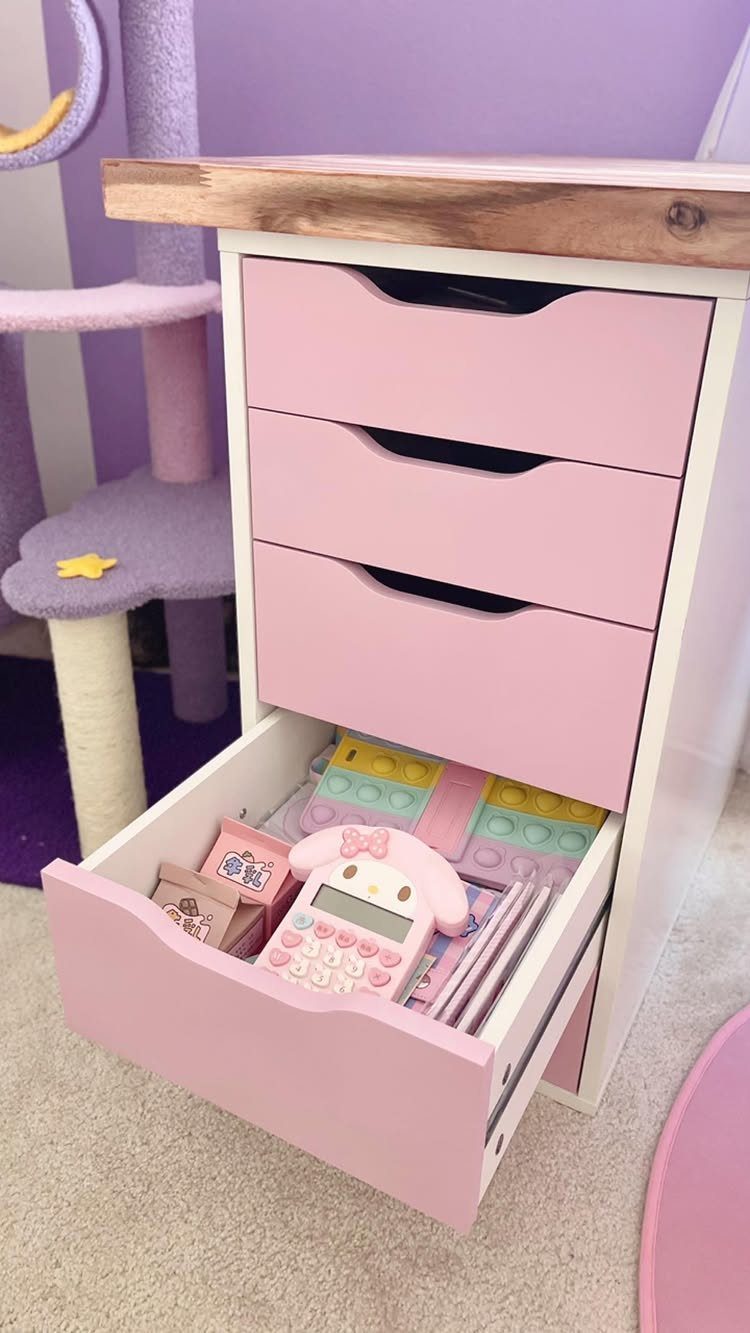
A coat of interior latex paint changes the look of an Alex unit completely. The pink finish softens the standard white, and because latex goes on with a roller, the coverage is fast.
Sand the surface lightly first so the paint grabs, then apply 2 coats with a foam roller for the smoothest result.
Let each coat dry fully before the next. I like this for rooms where white reads too clinical but you still want the streamlined shape.
The wood top adds warmth against the painted base without adding another step.
2. Desk with Side Storage
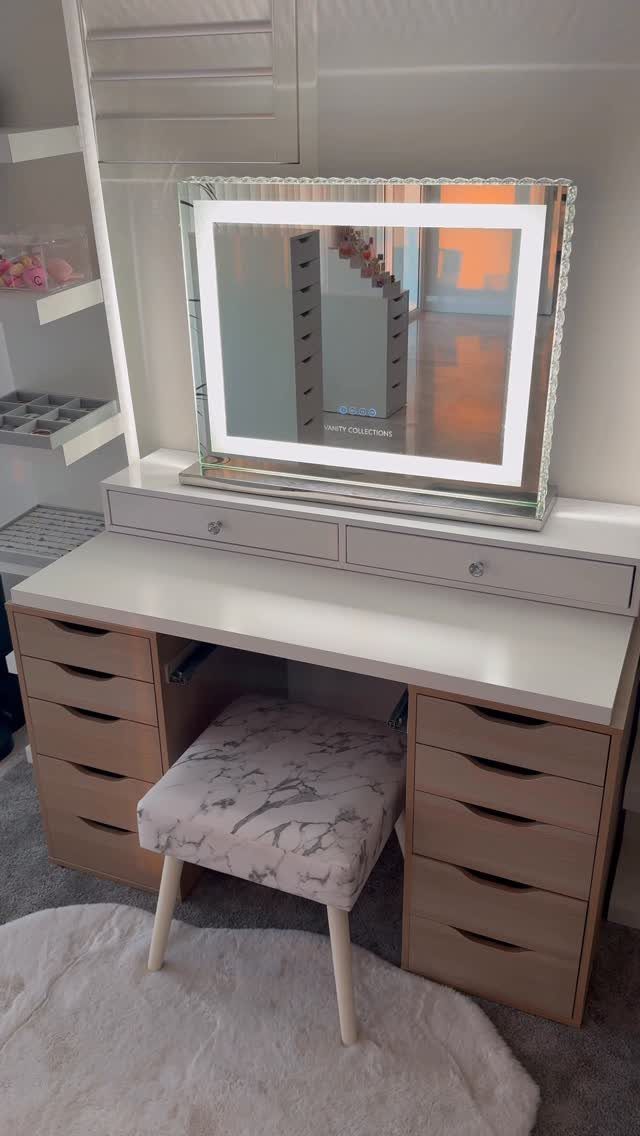
2 Alex units placed on either side of a desktop give you storage without taking up floor space in the center.
The light brown units break from the standard white, and the open middle keeps the desk from feeling heavy in a small room.
Pick a desktop width that spans both units with enough clearance in between for your chair. The symmetry works well in a vanity setup like this one, where you need equal access to both sides while sitting centered.
3. Adding Trim to Drawers
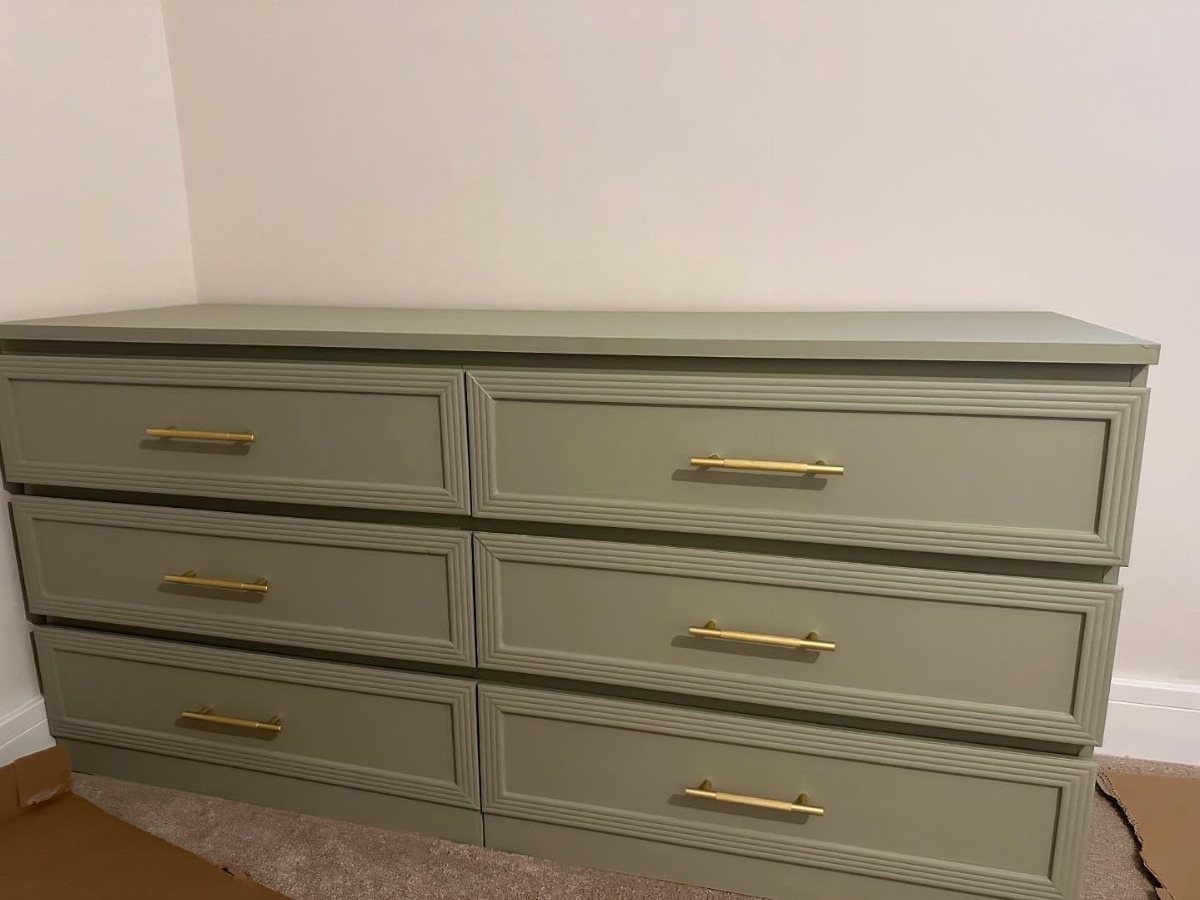
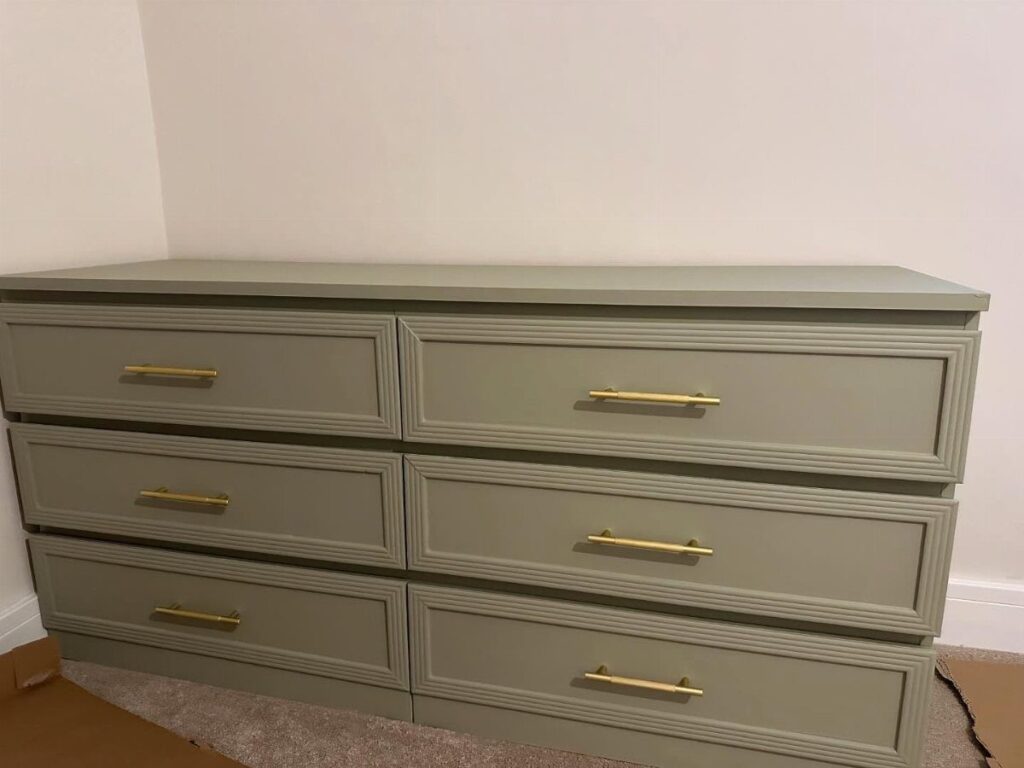
Flat trim applied to the drawer fronts turns plain Alex drawers into something that looks built in.
Cut rectangular pieces of lattice or panel molding to fit each drawer face, leaving a border all around, then attach with wood glue and finishing nails.
Paint the trim and the drawer unit the same color so the detail reads as one piece. I prefer this in a bedroom where the desk doubles as a vanity and needs to feel less utilitarian.
4. DIY Desktop
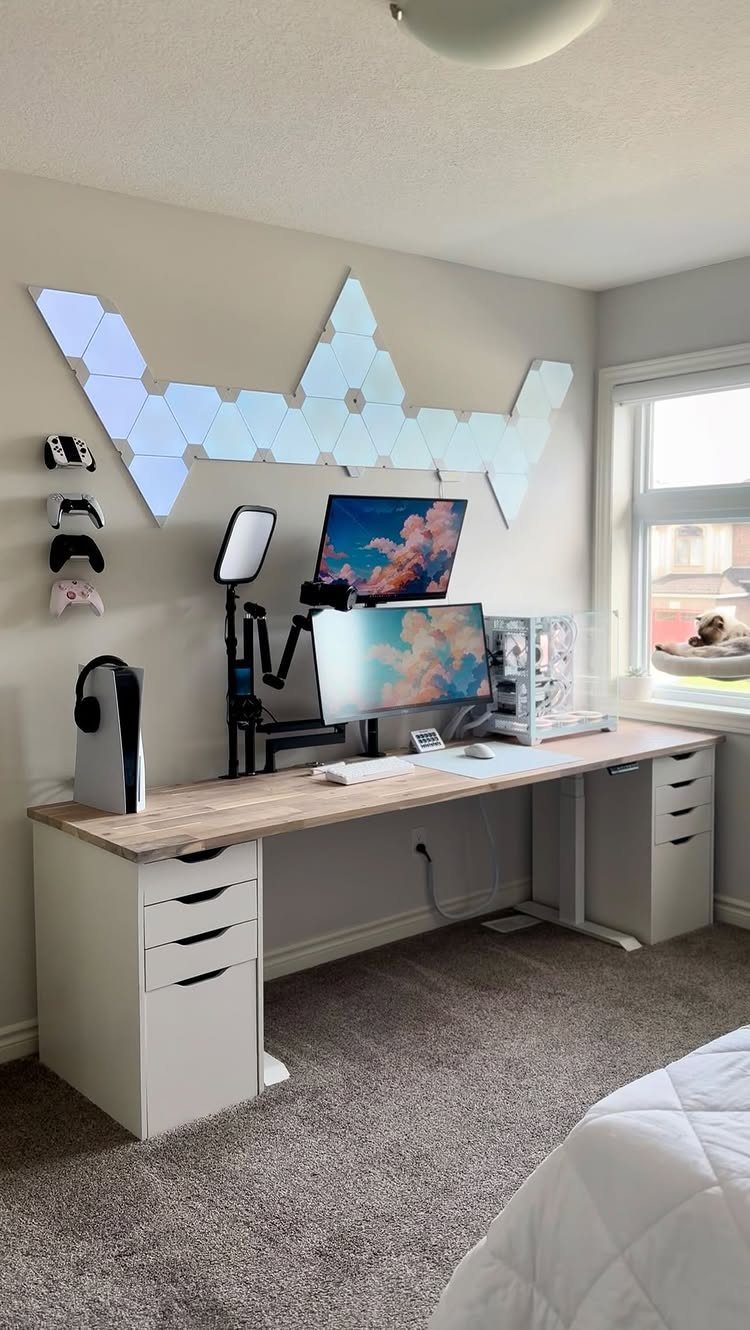
A butcher block countertop or a piece of solid wood cut to size gives you a desktop that fits your space exactly. The light wood sits on 2 Alex units and spans enough width for a dual monitor gaming setup.
Measure the distance between your drawer units, add overhang on both ends, and have the lumber yard or home center cut the slab to length.
Set it directly on top or secure it with brackets if you need it fixed in place. This costs more than a laminate top but the grain and the edge thickness make it feel custom.
5. Ikea Hack / Slim Desk
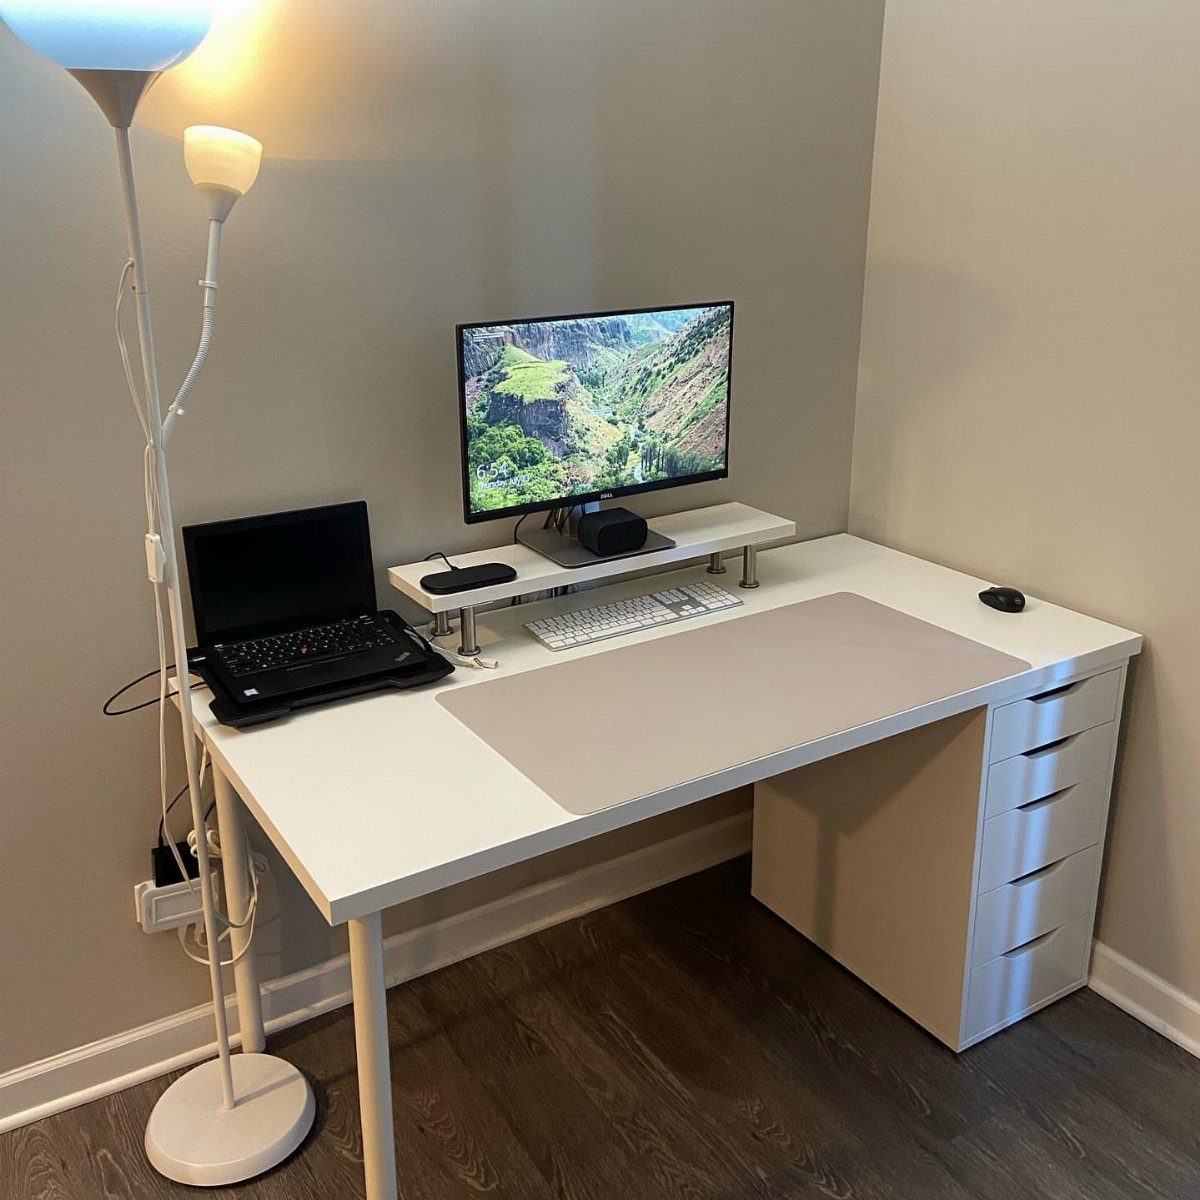
One Alex unit paired with a single leg on the opposite side gives you a full desk in half the footprint.
The setup fits in a narrow bedroom or a corner without blocking a walkway, where drawer units on both sides would crowd the space.
Use an adjustable leg like the IKEA Olov so the height matches the drawer unit exactly, then choose a desktop that spans the gap. The single unit still holds files, supplies, and cables while leaving the floor open underneath.
6. Art Studio Table with Alex Drawers
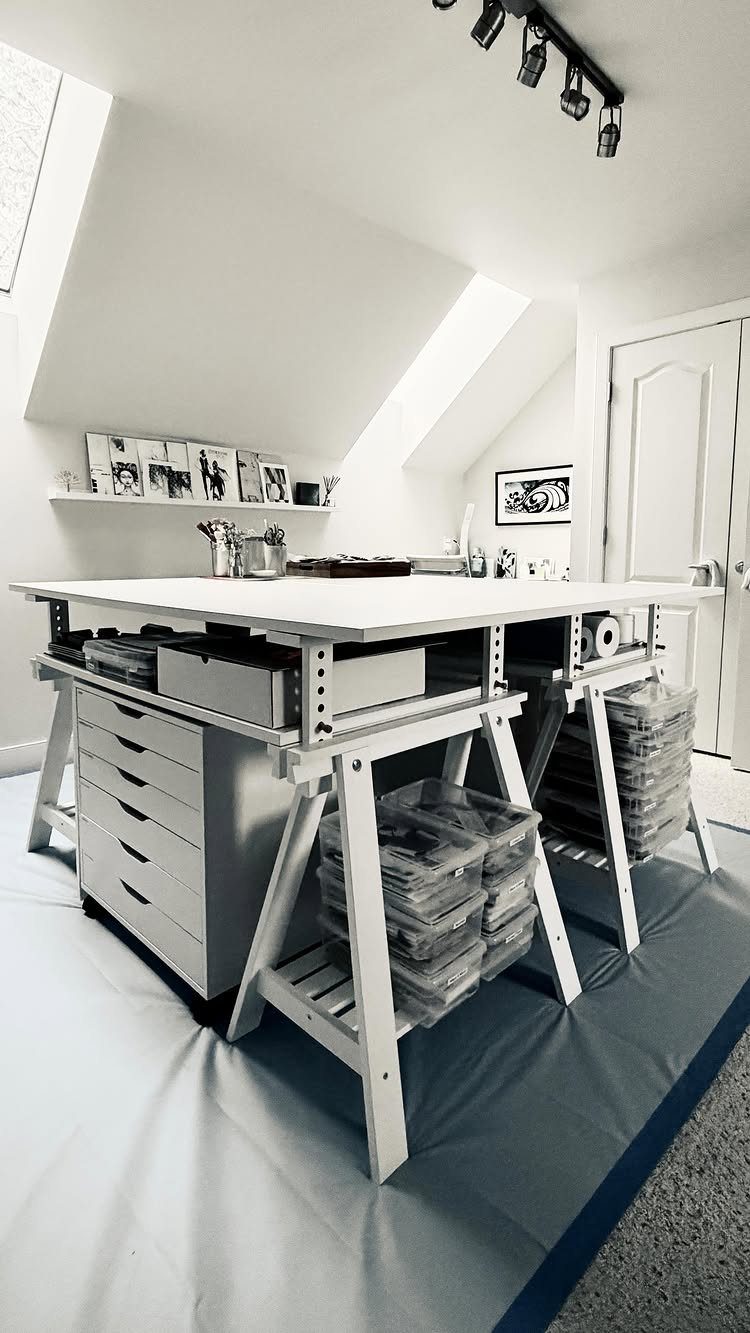
A trestle leg on one side and an Alex unit on the other creates a large work surface that keeps art supplies within reach.
The setup here uses plastic bins underneath the open side for brushes, paints, and paper that you need to grab quickly.
This layout gives you more tabletop than a standard desk because the trestle spans farther without middle support.
I like it for messy projects where you need space to spread out and don’t want to interrupt your work to dig through closed drawers.
The white finish hides less than darker colors would in a room with good natural light.
7. Labeled Craft Storage Unit
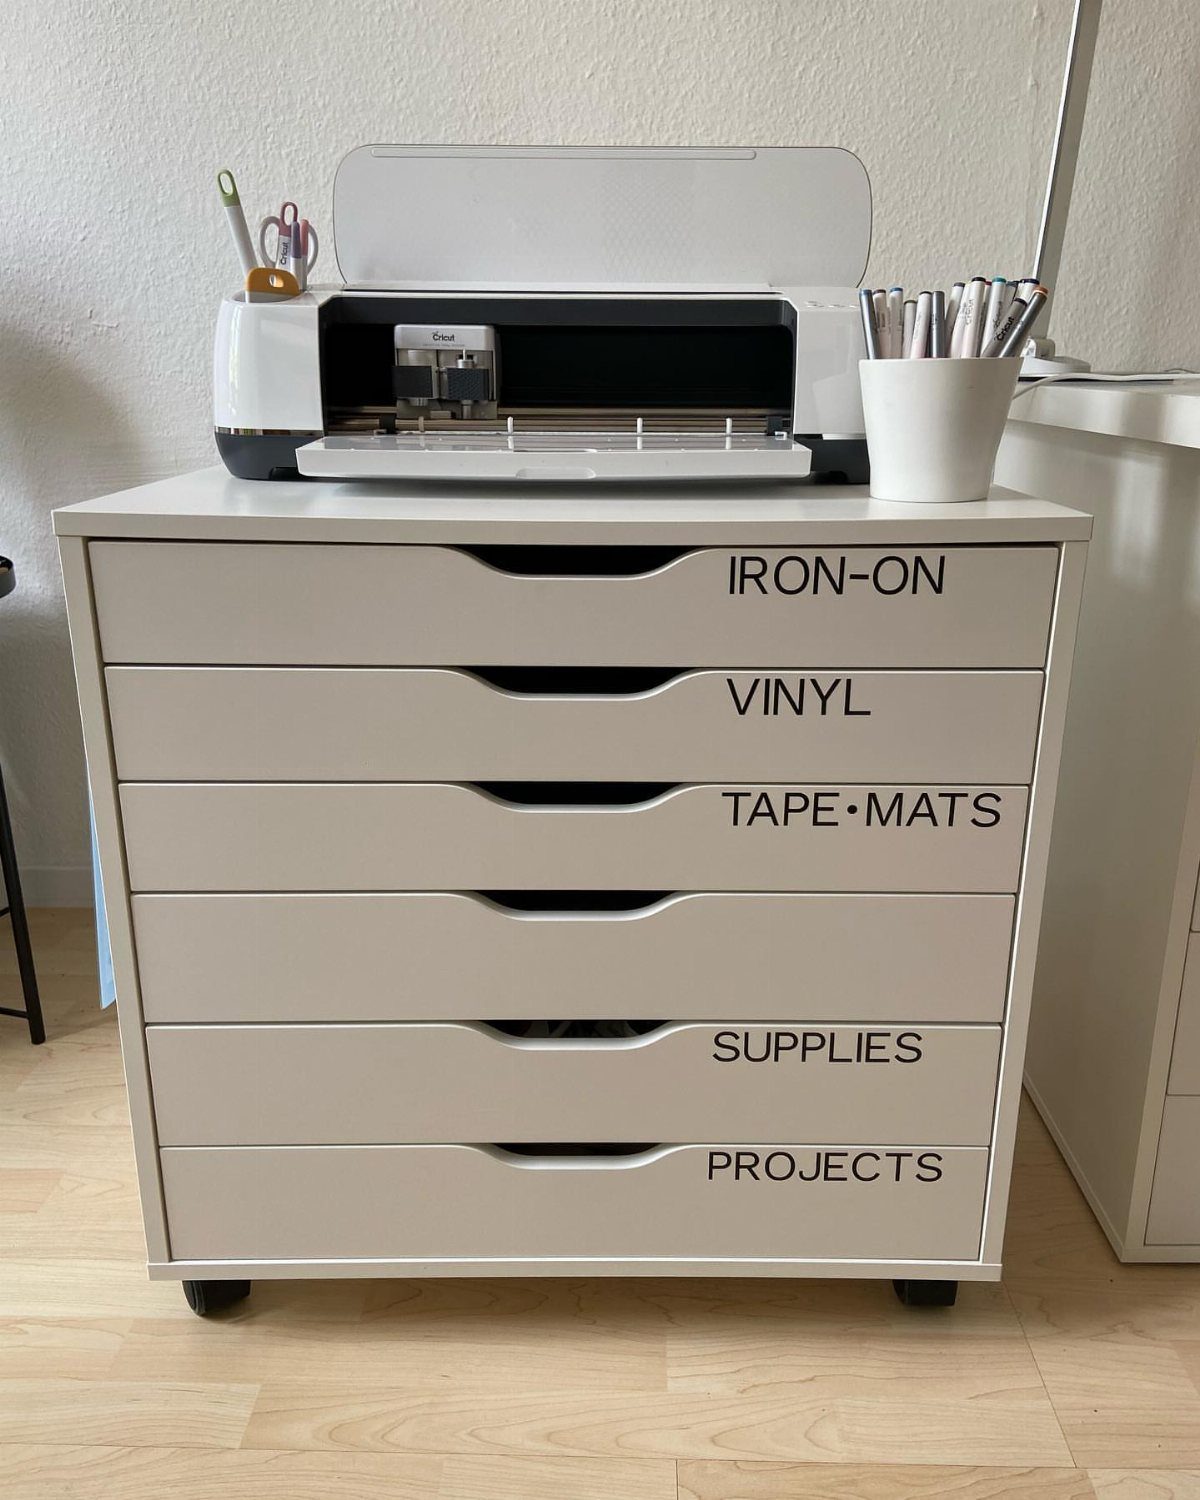
Vinyl labels cut with a machine like a Cricut turn a plain Alex unit into organized craft storage where you can find what you need without opening every drawer.
Cut each label to fit the drawer width, weed out the background, and apply it centered on the front.
This works best when the categories stay consistent. If your supplies shift around, chalkboard labels let you rewrite them, though the vinyl looks cleaner.
The top surface holds your cutting machine or a lamp without sacrificing drawer space below.
8. Shared Kids Study Desk
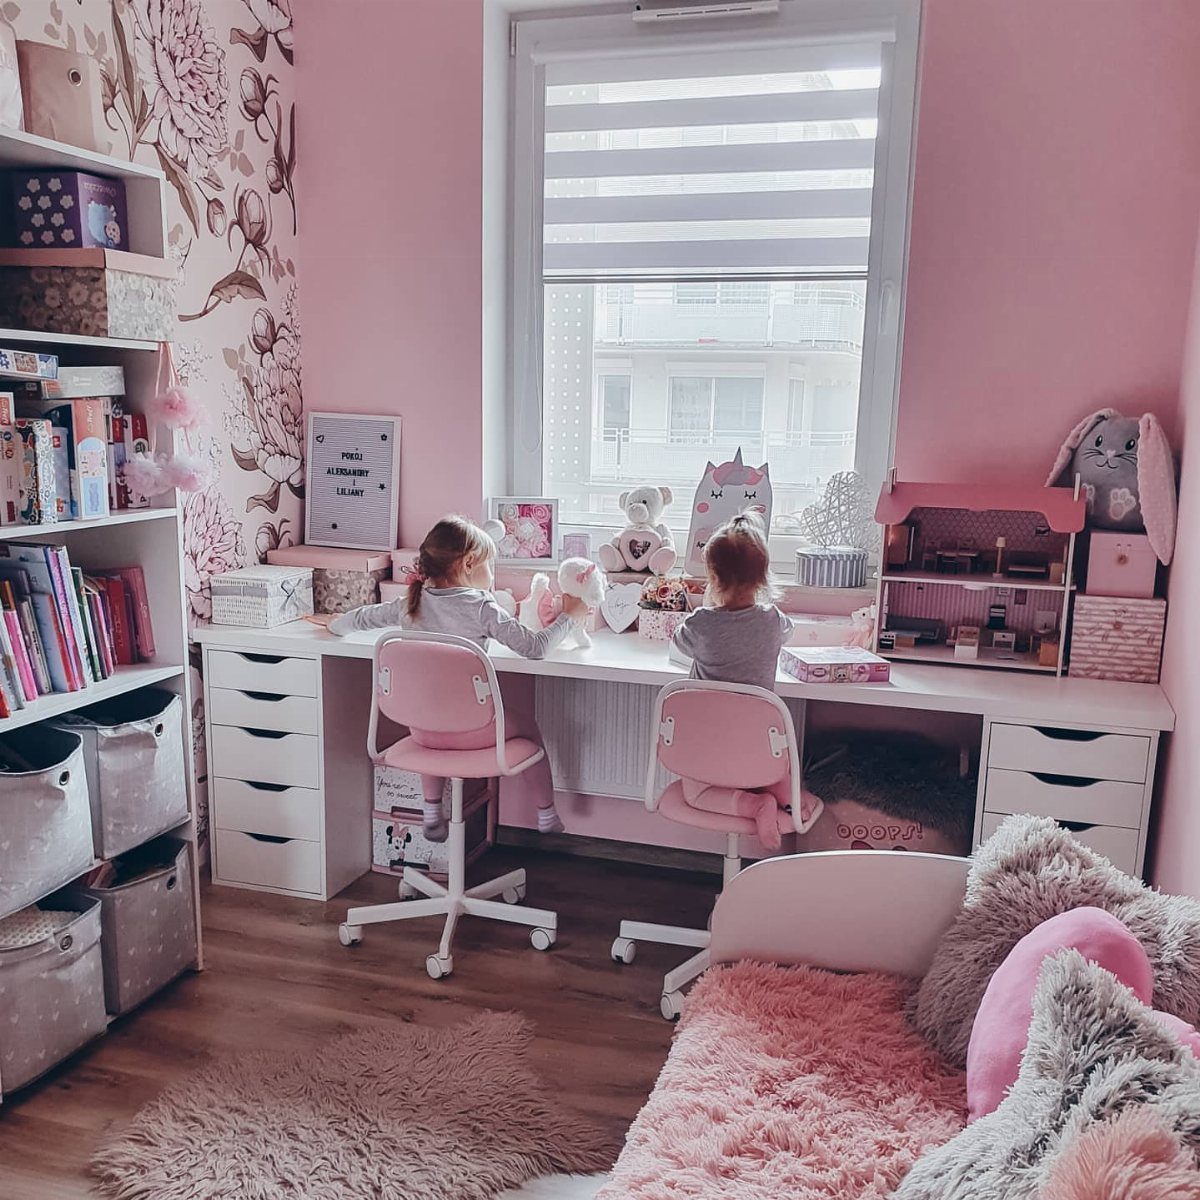
A desktop spanning 2 Alex units gives 2 kids their own work zones without splitting the room with separate furniture.
Each child gets a set of drawers for school supplies, books, and chargers while the long surface keeps homework, laptops, and projects spread out side by side.
Measure the space between where each child will sit so they both have elbow room without bumping chairs. I like this in a shared bedroom where floor space matters and matching pieces keep the room from looking cluttered.
IKEA ALEX Versatility
Alex units ship flat, assemble with an Allen key, and cost a fraction of what a finished filing cabinet runs.
That price point is part of why they show up in so many rooms: home offices, craft spaces, vanities, kids’ homework zones.
The carcass is particleboard wrapped in melamine foil, which takes paint if you prime it first. The drawers run on metal glides and the top surface is solid enough to support a desktop or a countertop slab without reinforcement.
Because the form is simple, a few changes shift the style.
Swap the pulls, paint the drawer fronts, or add flat trim, and the same unit reads farmhouse, industrial, or mid-century depending on the details you choose. The function stays the same but the look fits the room.
If a full refinish feels like too much, start with hardware or contact paper on the drawer faces. Both take under an hour and change the unit enough that it stops reading as stock.
Tools and Materials
Most Alex hacks need basic woodworking tools you already own or can borrow. A miter saw cuts trim and molding to length with clean corners.
A circular saw or table saw handles plywood and solid wood desktops. An orbital sander smooths edges and prepares surfaces for paint.
For assembly, wood glue bonds trim to drawer fronts before you pin it with finishing nails.
Clamps hold joints while the glue sets. A drill with bits handles pilot holes if you screw the desktop to the frame or add brackets.
Primer matters more than the paint itself when you’re covering melamine.
Zinsser BIN and Extreme Bond both grip surfaces that regular latex won’t stick to. Either one works.
If you’re building a desktop from scratch, birch plywood or maple board gives you a surface that finishes clean. Poplar works for trim because it’s affordable and takes paint without showing heavy grain.
Budget-friendly Upgrades
A quart of interior latex and a foam roller cover an Alex unit in 2 coats. The paint changes the color without altering the shape, so the room feels different but the footprint stays the same.
Flat trim from the hardware store gives you an inexpensive edge in poplar or pine. Cut it into rectangles, glue it to the drawer fronts, and paint everything one color.
Swapping the pulls takes 5 minutes per drawer.
Handles cost more than knobs but span the drawer width and make the unit easier to use. Both upgrades work without paint when time matters more than layers.
Contact paper covers drawer faces in patterns or solid colors for a few dollars per roll.
Cut it to size, peel the backing, and smooth it on. It’s removable, so it works in rentals where paint isn’t an option.
Frequently Asked Questions
Can I disassemble my IKEA desk?
Yes, Alex units come apart with the same Allen key used for assembly.
The metal drawer glides lift out once you remove the screws holding them to the carcass, and the panels separate after you back out the cam locks. Keep the hardware together if you plan to move or store the unit.
How can I upgrade my IKEA furniture?
Sand the surface lightly with 220-grit paper, then apply a coat of primer made for slick surfaces like Kilz or BIN before painting with interior latex.
Add flat trim to drawer fronts for a built-in look, or swap the pulls for handles that span the full width. Contact paper works in rentals where paint isn’t allowed.
What type of trim should I use on the drawer fronts?
Poplar or pine lattice molding in 1/4-inch thickness gives you a shaker-style edge without overwhelming small drawer faces.
What type of paint should I use on IKEA furniture?
Interior latex wall paint works after you sand and prime the surface. Sand lightly so the primer grabs, then apply a bonding primer like Zinsser BIN or Extreme Bond that sticks to melamine.